In a previous post,
this one, I showed you how to make a simple felt rose that could be used as a brooch. Today I am going to show how the same technique can be turned into a rose on a stem to put in a vase, and also turned into a corsage.
You will need:
Felt, wire (I used florists wire but you could use an alternative and children can use pipe cleaners), florists tape (or an sticky tape), thread for sewing, and scissors, and a brooch back for the corsage.
Cut a square of felt. I have not specified how big as it is up to you and you can experiment with the size. However, I cut one sheet of felt (approx 9" x 9" (23 x 23 cm) ) into four. And my square (which is probably more of a rectangle) is one of these.
Cut the corners off, so that they now curve.
Now you need to cut a spiral. This will make the shape of your roses. I made two roses: the first uses the top spiral, and for the second I wanted to make a thicker, smaller spiral. I hope you can see the differences.
When I made these with children the great thing was that each child's spiral was different meaning their finished rose was different. So from the same basic idea they had something individual.
Take the first bit which is the outside edge (where you first started cutting). Wrap tiny bit round the wire and sew it on.
Bend the tip of the wire over.
It is important that you now twist the wire. If you do not then the rose could slip down the wire.
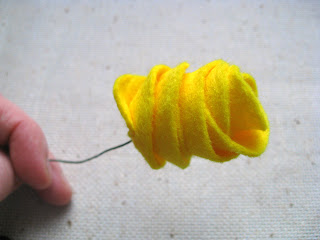
Keep rolling the felt spiral round the wire. Keeping the bottom bit in line. Every now and then sew a few stitches through all the layers of felt - but just at the bottom.
Keep rolling and sewing.
You may have to pinch the bottom, or draw the stitches tighter to bring the bottom in and tighten it up so it is not too loose.
Remember to sew through all the layers at the bottom.
When you get close to the end of the spiral of felt, you do not have to keep it in edge with the rest of the flower. Bring the next bit down as you roll and this will cover the last few twists in the wire and your (certainly my) messy stitches.
You will need to bring the last bit of the spiral over to cover the bottom and sew it on.
Your rose is now complete.
I had a long piece of wire so I just sewed another rose on the other end and then bent it and then popped it in a vase.
How to Make a Corsage
You will need felt roses on a stem, brooch back, and florists tape.
Twists the two roses together in a way that you want them to look.
Begin to wrap the florists tape round the stem.
Keep wrapping as you work up the stem, to the bottom of each rose and then back down to where you want to position the brooch back.
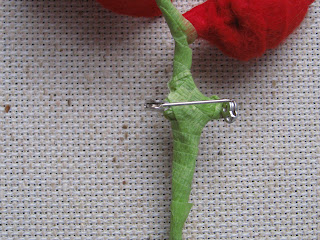
Put the brooch back on opened. Wrap the tape over one way and then the other a couple of times to hold the brooch back in position firmly.
If you want to hide the brooch back then you can always add a few felt leaves (or use any material you want).
I just put these in the front so they hide the brooch back and wrapped them with the tape.
The tighter bud rose was made in the same way but I moved the edges of the felt down a bit when rolling instead of keeping them in line with the last edge.
UPDATED 5 March 2013 - Of course, as my sister pointed out, you could always put the brooch back on longways in which case you probably do not need the leaves to hide it!
So there you go. Two tutorials for the price of one! Please excuse the glue on my hands. This was my first time using florists tape and I found it very easy, so do not be put off. But if you cannot get any then you can use and tape, or even strips of green felt and glue or stitch them on.
I hope you have enjoyed reading this and will have a go yourself. I would love to hear any comments so please do leave some. I do moderate to keep out spam. Also do leave links to any photos as I would love to see the roses that you make.


.jpg)

